.JPG)
This 2014 Chevrolet Cruze with 3,134 miles was in a recent collision event. The body shop did a great job of putting humpty dumpty back together again. Part of the repair was the replacement of the SDM (Sensing and Diagnostic Module) for the airbags as well as several other airbag related items. On many late model GM products the SDM comes blank and needs to be programmed and a setup procedure completed before the airbag lamp goes out and the vehicle can be returned to the customer. This is where I come in. Now I always tell the body shop on GM products that they have to have all the bad components replaced and a brand new GM SDM needs to be installed. The reason for all the faulty component replacement is because the SDM will not finish the setup procedure if there are any
faulty components such as open connections, blown out pre tensioners, etc. The reason for the GM module is simple. There are many outfits that claim that they can rewrite crash data on a SDM and then it can be reused. I personally don't agree with this and have always have had issues when trying to setup these modules. The normal price for a GM SDM is typically not that expensive why waste your time. So lets get the show on the road.

So the first step is to program the SDM. This will program the proper software into the module for this particular vehicle it is VIN driven. I hook up my laptop and use my GM MDI for an interface. I also attached my Midtronics battery maintainer and checked for proper voltage for programming. Using GM SPS I program the new SDM with the proper calibration. The screen above is just confirmation of a successful programming event. There are also valuable instructions in the smaller box. Basically, it says you must now run the Setup SDM application successfully for the module programming to be complete. I run the Setup SDM application which is a two part procedure. The first part marries the new SDM to the vehicles BCM. This procedure is called Setup Primary Key in BCM which it completed successfully. The next part is to Enable Deployment Loops. This vehicle failed to run this application successfully. I knew it wasn't going to be successful because the airbag lamp after programming the SDM was on solid. It should be flashing. Ok, the body shop must have missed something. This happens all the time when a part doesn't get installed or a connector is not attached properly.

This vehicle is a Global Architecture vehicle so a Tech2 will have limited to no data. Instead the factory tool here is GDS2. It is a software you lease from GM TIS. I run it though my GM MDI as this is the true blue factory way. There are other interfaces that work quite well with GDS2 as well. GDS2 is not as intuitive as the TECH2 and does take some getting used to. Lets check for some codes in the airbag system.

Here is a few screens in. The modules are listed on the left. I choose the airbag module.

Here is the trouble code screen. It tells me the trouble code and subcode, description, and status. As you can see we have three current trouble codes. The configuration code is due to the SDM not completing the Setup procedure. Our issues are with the two other codes for passenger side seatbelt pretensioners. Lets get some data.

I head into the Module menu and choose Data Display.
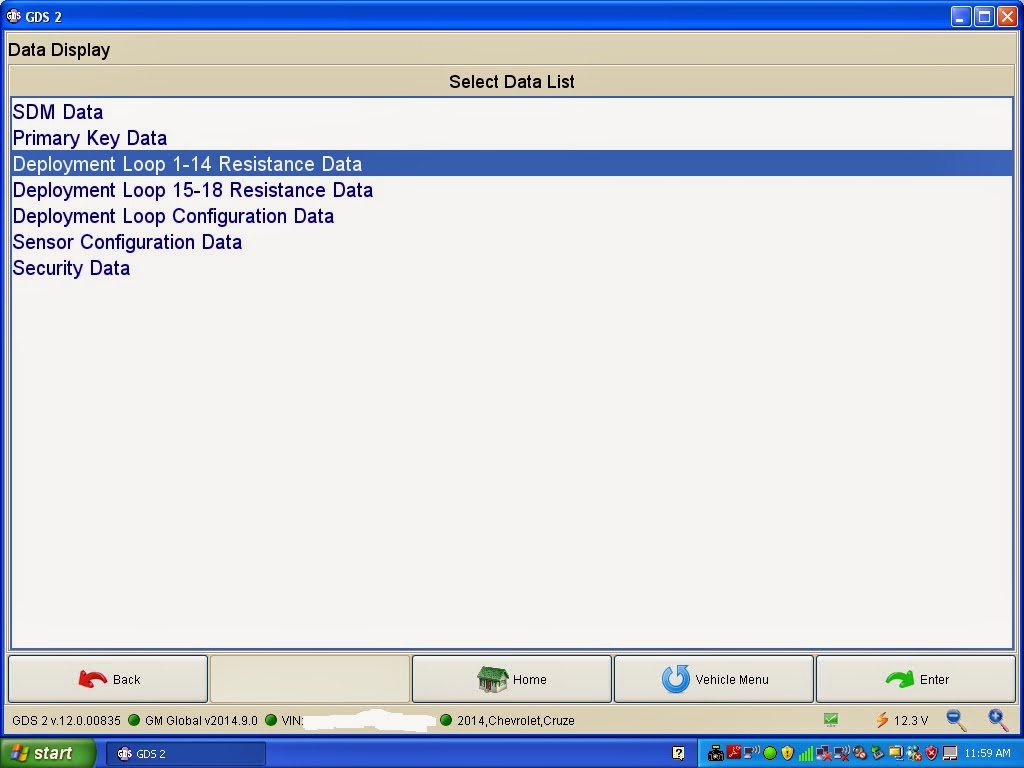
A wealth of information can be found in data now. Early GM systems had almost no useable scan data. Late model vehicles it is information overload. I choose Deployment Loop 1-14 Data. I am looking for something to smack me in the face.

There it is Loops 6 and 8 are different than the rest. The 25.50 ohms reading I see is typical of late model GM for a completely open circuit. Look at the other pids all typically between 2 to 3 ohms which is industry standard. Lets look at the items in question physically.
.JPG)
This is the drivers side seat belt seat pretensioner. This is how it should look-this is normal and our scan data supports this. Lets have a look at the passenger side.
.JPG)
A little different, right? When the vehicle was in the collision the SDM "blew" the pretensioner here and the belt sucked in to lock the occupant into the seat for safety. Ok, now I tell the shop owner we need more parts. I explain the issue and the fact that when he has all the parts correct the airbag lamp will flash. At that point I can come back and finish the Setup Procedure.
.JPG)
A couple of hours later I get a call from the shop. Parts are installed and airbag lamp is flashing. These are the old parts. One part is the aforementioned seatbelt pretensioner and the other is the B pillar belt assembly which also had a code for an open pretensioner. Remember, the codes.
.JPG)
Here is the after shot. Now, lets recheck that data.

Now, that's better. Time to run the Setup Procedure.

I choose the Configure New Module application in GDS2. It runs and completes. The airbag lamp goes out. Lets check for codes to be sure.

Success. I turn the key off and restart the vehicle making sure the airbag lamp goes through its normal cycle. I also check the PPS (Passenger Presence System) for proper operation. A recheck for codes and inform the shop owner we are good to deliver the vehicle.
Outstanding!
ReplyDeleteOutstanding!
ReplyDelete