.JPG)
This is a 2004 Chrysler PT Cruiser 2.4 Liter Turbo model with 96,158 miles on it. This shop called me in about a week ago to look at a Knock Sensor code. I diagnosed the Knock Sensor code as a bad PCM. The vehicle ran well at that time. I advised the shop a replacement PCM would be needed turn the MIL lamp out and pass the monitors for state inspection. I get a call a week later stating that they went with an online source for the PCM. They ordered this PCM and installed it they had no more Knock Sensor code but had a very poor running vehicle with a misfire. They had some type of "coil" code so they installed a replacement coil pack only to have the misfire and code return pretty much immediately. No Knock Sensor code returned but the vehicle was running very poorly. He asked me how he should proceed. I advised the shop that if he did not have this poor running and "coil" code with the original PCM that it was either a bad replacement PCM or something happened in between. They called the aftermarket supplier of the replacement PCM and they agreed to have another shipped out. They installed the second replacement PCM and the vehicle ran even worse. At this point they wanted me to have a look.
I arrived at the shop started the vehicle and indeed it ran poorly with a substantial misfire. I pulled a code P2302 code. This code is for coil #1 Insufficient Ionization. This is a very common code on Chrysler vehicles. On this Chrysler style ignition system the ASD (Automatic Shutdown) relay supplies battery power to the positive side of the coil. The voltage flows through the primary windings of the coil out the coil negative terminal back to the PCM. The PCM is the ignition module and responsible for primary triggering. This code sets when it does not see proper primary events. The flowchart for this code is vague at best. I see many reasons for this code. But I always start with a Crankshaft Sensor and Camshaft Sensor scope test looking at the signals and the relationship. This is of particularly great importance on this vehicle. I see timing belt installation errors all the time. On this vehicle timing belt jobs can be challenging. Yes, you can look at cam and crank error in degrees with the scan tool. But, I want to see the raw data.
Here is the scopeshot. Crankshaft Sensor is in blue and Camshaft Sensor is in red with the vehicle running at an idle. What do you think? I think the sensor voltages are nice I see nothing strange. But what about the relationship? This is where building a known good waveform library helps.

Here, I have a saved waveform from a known good vehicle of similar year and motor size. So what are we looking for? Here is what I do.

I pick out something repetitive and telling. In this case I see the falling edge of the Camshaft Sensor pulse after the large pulse lines up with the falling edge of this wide Crankshaft Sensor pulse everytime on my known good. I also see it does the same on my PT Cruiser capture. This is very important without this proper sequencing coil events, injector events, and others can get skewed or fail to happen causing misfires, MIL illumination, no starts, etc. So what's next?

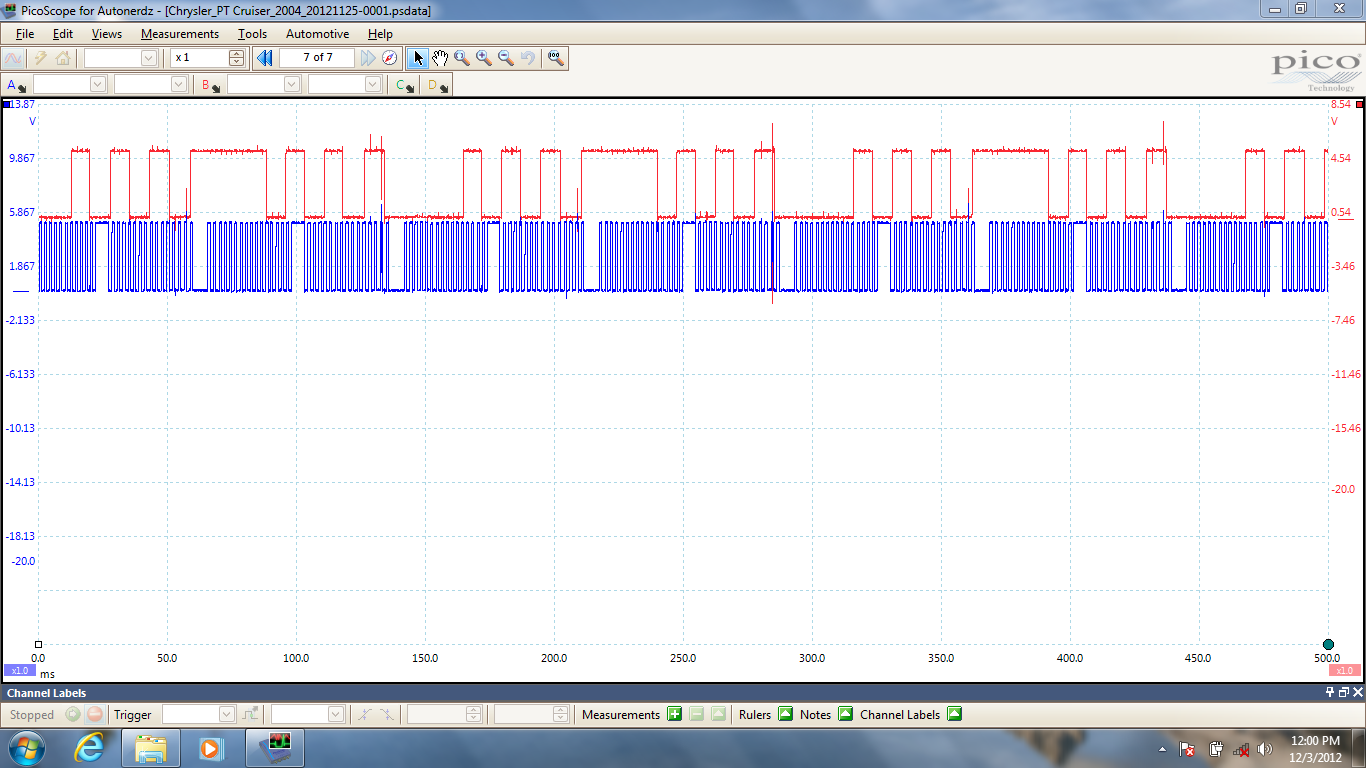
Let's add the primary operation of the portion of the coil that is not flagging the code. I see a nice consistent primary triggering on this wire that triggers the coil that gives spark to the #2 and #3 cylinders. Now, let's have a look at that problem circuit.

I see no primary events at all. In fact it never wavers at all. It stays low all the time. How low? Let's bring in some cursors to measure.


Oh yeah the twenty dollar test light. No LED's, no circuit boards just the old fashioned test light. So here I have the clip end of the test light to battery positive and the point in coil trigger wire for the coil that is operating. No light no ground. Now, let's look at that problem circuit.
.JPG)
Yikes! This circuit is grounded. Next, we need to see if its the wiring or the PCM driver.
.JPG)
Disconnecting the correct PCM connector and the test light goes out. Bad PCM. A further investigation of the coil revealed a bulging blown out coil from getting grounded all the time. I advised the shop owner that the vehicle needs yet another PCM and a new coil. I cautioned the shop owner that these PCM's remanufactured either from Chrysler or aftermarket sources have a high fail rate for problems after remanufacturing. I would recommend new if available. I have been through this more than once where multiple remanufactured PCM's had issues resulting in either a new or even a used units to be installed to get the vehicle repaired properly.
A couple of days later I was back at the shop programming a Chrysler remanufactured PCM (The customer nor the shop wanted to spend for the new unit) and installing a OE coil. Afterwards the vehicle started and ran properly. Thankfully.

Those of you that follow me may have noticed something different on this post. I am using a Pico scope instead of my usual Snap On Modis. The Pico gives me a little bit more versatility for data capture. The Snap On scope products are very good units. Here, I have a section zoomed in. Nice right. Want more zoom.

I am just scratching the surface with this tool. I am learning more about it's capabilities everyday. Looking forward to sharing it with everyone.